Cloud Computing Course, Part 2: Amazon’s EC2
What if you could get a Linux server running in 5 minutes or less and have it cost you a couple of cents per hour? You can, and I'll tell you how.
Probably the easiest way to launch a virtual machine in the cloud is by getting yourself an account with Amazon Web Services. Essentially, that means you need a credit card so you can be billed for the time and resources you use. The price per hour for a small instance (the default machine) is 8.5 cents per hour. If you run your test machine for a hundred hours, it will cost you $8.50 — larger deployments cost more, obvioulsy. Take that over the course of a month and you're paying as much for a small system as you would renting physical hardware from a hosting provider. One important difference here is speed. Where you may have to wait a day or two for a machine from your hosting provider, creating an EC2 virtual machine is blindingly fast in comparison. Deploying a new machine here takes only a few minutes on average.
Amazon also has a "micro" instance which you can get for only 2 cents per hour. Tiny mean you only have 8 GB of disk (EBS, or Elastic Block Storage) and 613 MB of memory. Performance is low, but hey, it's only 2 cents an hour. Great for testing.
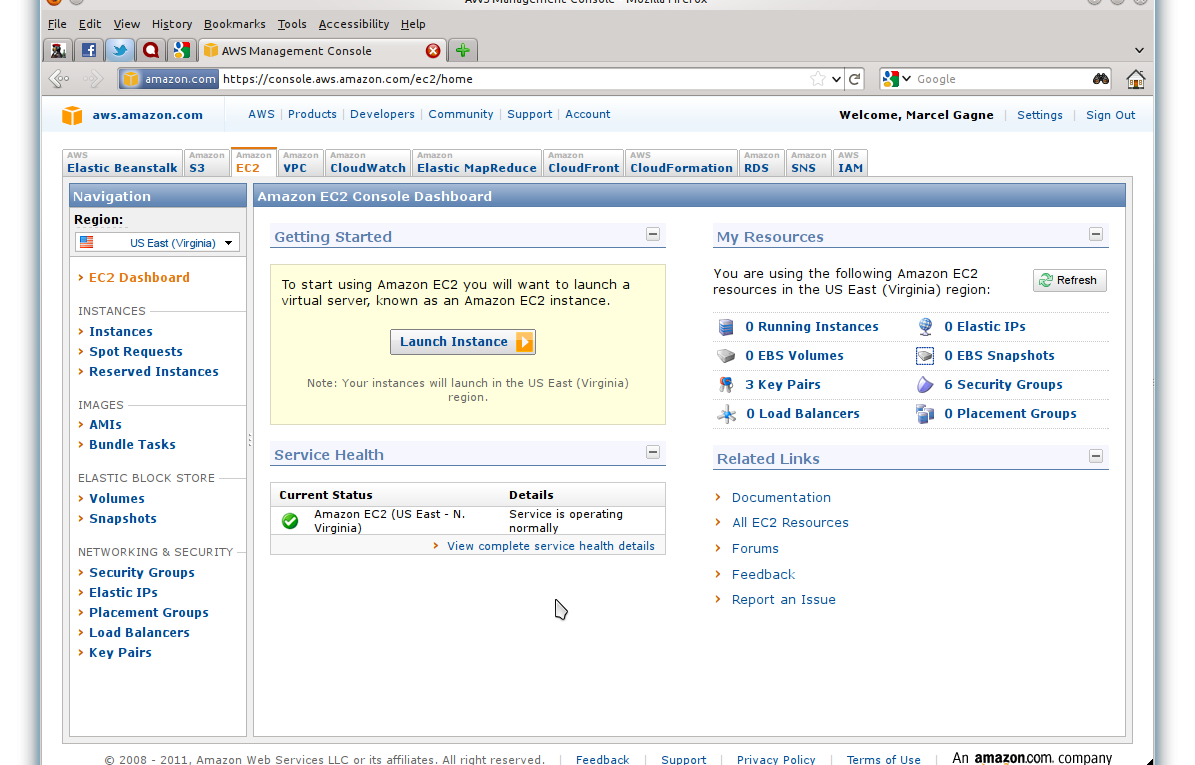
Everything takes place from the Amazon EC2 management console (see Figure 1). The dashboard view shows you current instances (what Amazon calls your virtual machines), what type they are, their status, IP address and so on. The dashboard also lets you sort on a variety of criteria including the region in which your machine is deployed (you can have machines in Virginia, California, Ireland, or Singapore). It also provides access to your volumes (storage devices), snapshots, security profiles, SSH key pairs, and pretty much anything having to do with running a virtual machine in Amazon's cloud.

Figure 1 The Amazon Elastic Cloud (EC2) console. Note: Click any image for a full sized view.
To get started, Click Launch Instance. Amazon provides a small handful of supported AMIs but these tend to be a little behind the times. Your best bet, if you don't want to create your own, is to look under the Community AMIs section (see Figure 2). You'll find distributions galore at a variety of release levels. To narrow down your search, enter the text you wish to filter by (e.g. Ubuntu or Natty) in the search box, just below the AMI tabs. Just pick something that works for you as a base and go from there.

Figure 2 Community AMIs greatly outnumber those supported by Amazon. You can create your own as well.
When you see something that looks like what you need, click the Select button. This is the place where you can select the instance type. If you want your 2 cent per hour machine, select micro here (see Figure 3). Click Continue . . .

Figure 3 Select your instance type here.
Once you do this, another window will appear that allows you to choose a ramdisk or kernel option; these are the advanced instance options. Unless you know what you are doing and you are familiar with the images provided, leave this alone. There's another option to enable Amazon's Cloudwatch feature. We'll leave that one off for now. If you so desire, you can enter a comment in the provided box. click Continue to the key pair creation/selection screen (see Figure 4).

Figure 4 Time to create a key pair.
Each new instance of a virtual machine is accessed initially via SSH. To connect to your new instance, you'll need a key pair. If this is your first time with AWS and EC2, click the Create Key Pair button and enter your details. You may also select an existing key pair if you've already been through this process. Download the key and save it somewhere appropriate. Make sure you give it a secure set of permissions (e.g. "chmod 0600 yourkey.pem"). Click Continue.
The next step is to select or create a security group. This is the step in which you create your firewall rules. By default, you'll get SSH access to the machine, so it's important to decide just what services (ports) you want to make available, whether it be email or Web or whatever. Start with SSH and add whatever else you'll need (e.g. HTTP, SMTP, etc).
Click Continue and you'll find yourself at a final review screen where you have the option of changing any and all of the choices you have made up to this point. If you're happy, click Launch. Keep in mind that you can keep a machine running for as long as you want or for as little time as you want. If you don't like the result, terminate it and you'll have spent very little. A few minutes later (most of my machines take no more than five minutes), your new machine will be ready for access. You'll see the new machine in your management console listed as running. To connect, right click on the instance you want, and select Connect. A pop-up window will give you instructions and the IP address you'll need to use to connect to your VM (see Figure 5).

Figure 5 Use SSH and your generated key pay to connect to the new virtual machine.
The command generally looks like this:
ssh -i ~/.ssh/salmar.pem root@ec2-184-73-6-230.compute-1.amazonaws.com
That's it. You're connected and ready to work with the virtual machine as you would any machine (see Figure 6). Install packages, load up your data, create users, run a Web server, and anything else you might do with a physical server. The VM exists until you terminate it and this is done from the same pop up menu as the one you used to get the connect information. When you're through with the machine, make sure you delete it. No sense in paying for something you aren't using.

Figure 6 Use your favorite terminal program to connect to your new machine.
Amazon's EC2 service is popular because it's fast and easy. And, properly used, it's also extremely inexpensive.
